- Camera: Canon S1IS
- Power Adapter: Canon CA-PS700
- Laptop: Dell CPx 650
- SuSE 10.1 Linux
- gphoto2 2.1.9
- Jorgenson wood clamp
- Scrap of wood
- 2 heavy duty rubber bands.
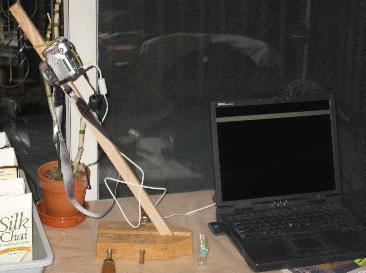
Once I saw how fast the trees were growing, I wanted to record more than simple still images.
This led to an automated setup that takes photos at intervals, a little manual work to copy files around, and another script that extracts the interesting parts of the large images and makes a time-lapse movie.
Here's the movies of the three sprouts.
| First Sprout | Second Sprout | Third Sprout |
|---|---|---|
The equipment use for this is:
|
|
|
The Canon S1IS is a nice camera, with the advantage that it speaks
PTP, a camera control language, rather than providing a mountable
disk drive interface (as most other digital cameras do). Info on
which cameras support remote image capture is available at the
gphoto site
Depending on the release of the gphoto libraries you use, there may be better support of the camera features, including the ability to zoom via remote control. The release I had on this laptop was older with reduced (but adequate) functionality. The downside to the Canon S1IS is that it goes through batteries like a 10 year old goes through bubble-gum. A fresh set of alkaline batteries will last about a day. The careful design of my precision positioning system doesn't deal well with dismantling the camera to replace batteries, so it was necessary to find a power supply for the camera. Fortunately, my local camera store (Huron Camera, Dexter, MI) had the power adapter in stock. |
| I raided my woodshop for a reasonable sized piece of scrap and found some maple about 1/2 inch x 3/4 inch. The 1/2 inch width fits comfortable between the lens and the battery pack protrusion. The wood was clamped in a Jorgenson wood clamp (available at any hardware store) and rotated to a reasonable angle. | 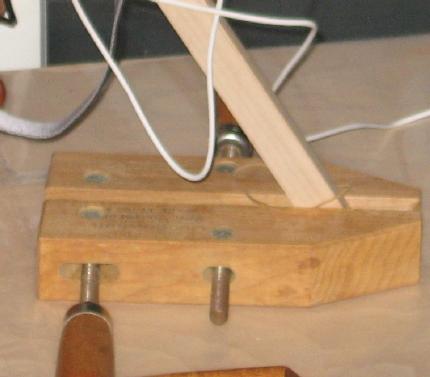
|
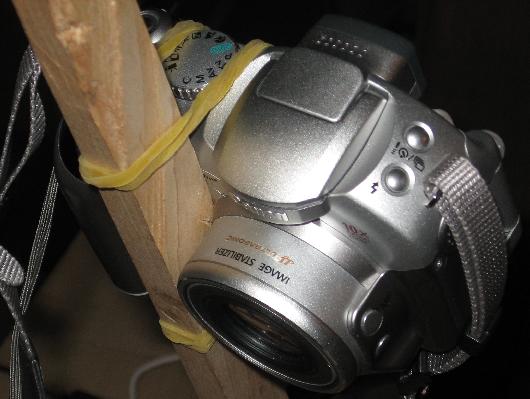
The camera was attached with a universal flexible adjustable clamp
(a few rubber bands) as shown below.

When installing SuSE 10.1, you need to explicitly install Tcl/Tk.
I use a short wish program to invoke gphoto2 to take the images. The control program renames the files using a timestamp (Mon-DD-HH-Min.jpg) to provide a record and make it easier to order the images.
The script looks like this. It's not optimal at all, but it works.
The various after calls are to give the camera time
to get ready for the next command. The length of these waits was
determined by guess and tweaked empirically.
pack [canvas .c -width 800 -height 600]
catch {exec gphoto2 --set-config capture=1}
after 200

set folder /store_00010001/DCIM/105CANON
while {1} {
  set sec [clock seconds]
  set hr [clock format $sec -format %H]
  set hr [string trimleft $hr 0]
  if {[string equal {} $hr]} {set hr 0}

  if {($hr >= 23) || ($hr < 6)} {continue}
  set fn [clock format $sec -format "%m-%d-%H-%M"]

  catch {exec gphoto2 -D --folder $folder} yy

  after 500

  catch {exec gphoto2 --capture-image} xx

  after 800
  catch {exec gphoto2 -P} xx

  regexp {as ([^\.]*).JPG} $xx a b
  regexp {folder '([^']*)'} $xx c folder

  # Make a reduced size gif image to load and display

  exec convert -sample 800x600 $b.JPG capt0000.gif

  # Rename the file to something with a time/datestamp
  file rename $b.JPG $fn.jpg

  # Display the image
  catch {.c delete $p}
  image create photo cap -file capt0000.gif -format gif
  set p [.c create image 0 0 -image cap -anchor nw]
  update idle
  # Sleep 7 1/2 minutes, and take the next image
  after 450000
}
The final step is copying the jpeg images to another system, extract the interesting part of the images and convert them to a movie.
|
The images I got from the camera are 2048x1536 pixels. This
is large enough to show most of the planting area, with
several growing plants in each image. But, this is
too many pixels for an video.
A reduced size image of the entire frame is shown to the right.
I used | 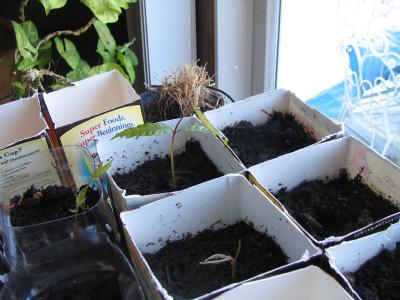
|
For the first set of movies, to prove it could work, these coordinates
were hardcoded into a bash shell script that used convert to
extract a portion of
the large jpeg file into a set of smaller images and then merge them
into a video file using mencoder.
Eventually, it occurred to me that the video clips should include some information about what they are. So, I made a small Wish script to decipher the file names back into date stamps, open the first image and use it as a backdrop, and just to be cute, fade from black to the full brightness image before starting the show.
The mencoder program is a bit sensitive to things like
different size images and different image header info, so I
moved extracting the parts of the image I wanted for this clip from
the bash script to the Tcl script, and then added some extra fades
and titles to show the night-time transitions.
By the time the dust settled and I'd commented the code abit, it was about 250 lines. Download/View the Tcl script.
The bash script is a lot shorter, and looks like this, repeated with different offsets and sizes for the different plants.
rm tree*avi tree*mpg tree*mpeg
rm saveit/*

echo "  convert -crop 640x480+650+500 $f saveit/$f"
wish makeJpegSet.tcl  640 480 650 500 saveit

mencoder mf://saveit/*.jpg -mf fps=5 -ovc lavc \
  -lavcopts vcodec=huffyuv:pred=2:format=422P:vstrict=-1 -noskip -o tree1.avi

mencoder mf://saveit/*.jpg -mf fps=5 -ovc lavc \
   -lavcopts vcodec=mpeg4:vstrict=-1 -noskip -o tree1.mpeg

mencoder mf://saveit/*.jpg -mf fps=5 -ovc lavc \
   -lavcopts vcodec=msmpeg4v2 -noskip -o tree1.mpg
Mencoder supports several codecs, and more options than your average
user will ever need. I found good pages about using mencoder
here and here.
The MPG file is much smaller than the AVI file, but simply changing the vcodec argument created a movie with terrible colors. With a bit of judicious tweaking I accidently came up the arguments in this script, which work well.